E is for Embroidery

E

The term Embroidery encompasses a lot of stitches and styles.  Crewelwork is actually a type of surface embroidery.  Usually, when we talk about embroidery we are talking about outlining and filling in areas on a piece of fabric.

embroidery
Image from Basic Embroidery Designs


There are special needles that are used and the size depends on the type of thread you choose to use and the fabric you are using.

The thread choices are quite expansive.  Floss, pearl cotton, and ribbon are just a few of them.  Patterns can be traced onto a background piece of fabric, or you can purchase many prestamped pieces.  Many stores sell the iron on patterns too.

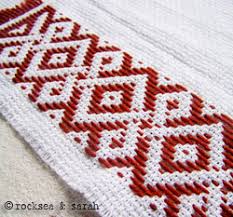
Embroidery that is only done in one color is called redwork.  I am not sure if you call work done in a single color that is not red if it is called blue work or blackwork, etc.  The traditional one color embroidery is red.

Related image
Image from Embroidery Library


This is an example of redwork.  Sometimes an outline is all that is done, sometimes small areas are filled in.

Image from Valdani


This is an example of pearl cotton.  There are several manufacturers of pearl cotton that can be purchased.  The size of the pearl cotton you use will change how the stitches look.  Quality is important when embroidering.


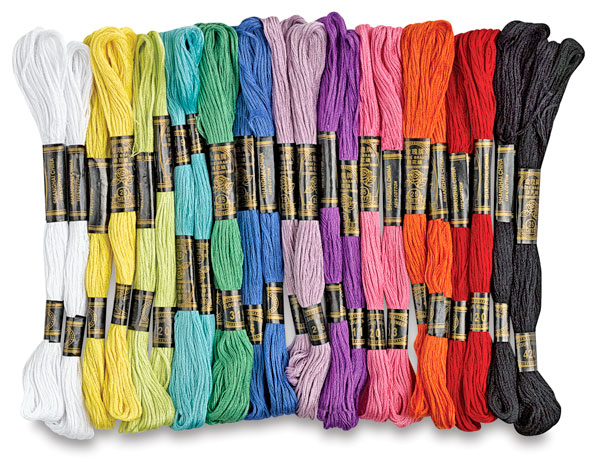
This is embroidery floss.  Usually, you separate the strands into sets of two.  Most embroidery patterns call for using two strands.  You should not cut your floss too long as it will tangle while you are stitching.  Again there are many manufacturers of the floss.

Embroidery Thread, 24 skeins
Photo from Creative Street Embroidery


Related image
Image from Artfabrik


Here is a chart with needle sizes and pearl cotton sizes.  As you can see, the size you choose will change the look of your stitches.

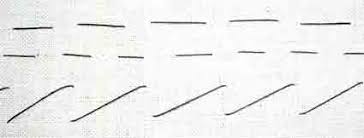
There are many, many embroidery stitches.  Too many to list here, but there are several sources that you can get that list them all and give instruction as to how to make them.

Image result for Embroidery stitches
Image from The Spruce

This is a sample of the most basic stitches.  There are many online resources that you can obtain instruction for free.

The last type of embroidery I want to mention is machine embroidery.  This is fun to do especially if you have little ones around you sew for.  I love to put little sayings and cute animals on my granddaughter’s tee shirts.  It’s also nice to monogram with an embroidery machine.  You can tell the difference between hand and machine embroidery.  It’s just a matter if you like using a machine more than hand sewing.

Image from SewYouDesignShop

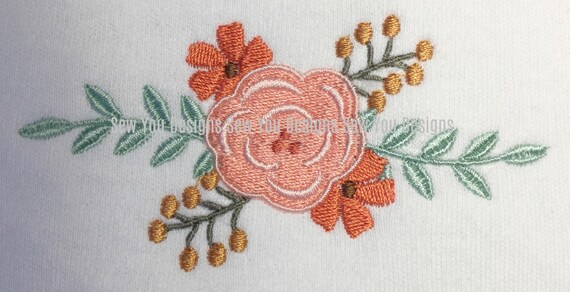
This is an example of machine embroidery.

When you are making an embroidery piece a hoop is used.  There are many types of hoops on the market.  Some are metal, some are wood, some are plastic some are round and some are square.  There really isn’t any right hoop or wrong hoop.  It’s what you are comfortable using.

I learned to embroider with a metal hoop.  It was given to me in the 1950’s.  I used it for a very long time.  The only problem I see with using a metal hoop is that they do eventually lose their finish and can put marks on your piece.  When that happened to my metal hoop I switched to a wooden one.  Now I use plastic hoops.  They make them now with a stop on the hoop so that you don’t push the hooped piece through the outer hoop.

When you are making an embroidery piece it is very important that when you are done stitching for the day you do not leave your needle in the fabric.  if you have excess around your piece you can stick it through that area, but never leave it where the stitching is.  If for some reason you don’t get back to that project for a long time, the needle can rust and stain your piece.

My mother had started a stamped tablecloth after she married my dad.  She had done a small amount of the work and put it away.  Years later after I was married it wound up with me.  I opened it up and the needle had stained the tablecloth.  I worked on that stain to see if I could get it out and I was unable to.  I was able to stitch over it by adding a small branch into the design.  I was lucky.  Another project I had left a needle was ruined.

Embroidery is fun and relaxing.  Projects work up quickly and you get better the more you do.  If you like to have something to do when sitting in front of the TV, I suggest giving embroidery a try.

Wanda


D is for Darning

D

Darning is a sewing technique used to repair holes or worn areas on fabric.  It can also be done on knitted and crocheted things too.  Usually, it is done by hand, but can also be done by machine.

Darning consists of anchoring the thread in the fabric on the edge of the hole and carrying it across the gap. It is then anchored on the other side, usually with a running stitch or two.  This is a simple over-and-under weaving of the threads.

Belgian darning,  which is fine darning attempts to make the repair as invisible and neat as possible. Often the hole is cut into a square or the darning blends into the fabric.The use of fancy weaves, such as twills, chevrons, etc., is achieved by skipping threads in regular patterns.

Invisible darning is the epitome of this attempt at restoring the fabric to its original integrity. Threads from the original weaving are unraveled from a hem or seam and used to effect the repair. Invisible darning is appropriate for extremely expensive fabrics and items of apparel.

In machine darning, lines of machine running stitch are run back and forth across the hole, then the fabric is rotated and more lines run at right angles. This is a fast way to darn, but it cannot match the effects of fine darning

I learned to darn when I was quite young.  I still have the darning egg that was my grandmother’s.  It has proven to be very handy in repairing sweaters, hats, and scarfs for the kids over the years.


patterndarning
Pattern Darning


darningwithegg
Using a darning egg.


sweaterdarning
Sweater Darning


Vintage-6-Wood-Darning-Egg-Sock-Darner-Wooden
My Darning Egg


Wanda

C is for Crewelwork

C

Crewelwork is a type of surface embroidery using wool.  An outline of an image is put on a piece of fabric, then the areas are filled in with different types of embroidery stitches.  This technique has been around for at least 1000 years.

I have made several crewel pieces over the years.  The only one I still have is the first piece I ever did.  My husband’s grandmother taught me how to do crewelwork after he and I were married.  We were at a yard sale in Lancaster.  As we were walking around, Nana found a kit to make a pillow or wall hanging.  I think we paid 25 cents for it.

When we got back to her house, she showed me how to do the crewel.  I really liked the effect that using the yarn made.  Regular embroidery floss does not give the dimension that the yarn gives.

My granddaughter Alannah did a crewel piece for her mother a couple of years ago for Mother’s day.  It is an easy project to teach young children since it works up fast and the stitches can be very basic.

Here is the wall hanging I made from that 25 cent kit we got at the yard sale.

crewelwork

I have always loved this piece.  Not just because it was the first crewel piece I did, but because of the bright colors used.

Wanda

B is for Basting

B

Basting is a term used for holding two pieces of fabric together prior to quilting or holding a zipper in place to keep it from moving while you sew it into a garment.  Basting can be done by hand or machine.  And in quilting also by safety pins.  Usually, basting stitches are long stitches that are easily removed after the article is completed.

In quilting, when you put your sandwich together, the top, bat, and backing, safety pins are placed spaced about six inches apart so that you can make your quilting stitches.

basting


Image result for quilt basting


A is for Appliqué

A

Appliqué is used very often in quilting and cloths construction. It can be accomplished by hand or machine. There are different ways of doing hand appliqué.  The needle turn method and the freezer paper method are the ones I am familiar with.

An image, say a flower is cut out of fabric.  It is placed on a background fabric by the use of small invisible stitches.  This is a task that is not easily done nor perfected.  I have attempted this technique many times with at best mediocre success.  My stitches are often too large and not nearly invisible enough.  The edges of my turned fabric are not smooth either.  I have been shown by a few appliqué experts and it just doesn’t stick with me.

So, on to the freezer paper method.  The freezer paper is ironed onto the back of the flower.  Then the flower is stitched onto the background with tiny invisible stitches.  After the flower is attached to the background, it is turned over and the back of the flower is slit and the freezer paper removed.  Again, my stitches are too big and can be seen.

In machine appliqué, the image is attached to the background using a sewing machine. There are several different feet and stitches that can be used. The feet and stitches are determined by how you want the edge of your image to look.  If you want it to look like it’s done by hand, you choose an invisible stitch.  Otherwise, there are many other stitches that can be used to add decoration to the applique.

Appliqué can also be achieved using wool fabric.  The stitches are much more prominent in the piece as that is the desired effect.  This works up quickly and gives you a much more primitive piece.

Lastly, an embroidery machine can be used to appliqué.  The machine stitches out an outline for the fabric, then it stitches around the layered fabric creating an appliqué.

All of these methods require practice and patience.  And they all produce a lovely piece of work when completed.

Below is a wall hanging that was a gift from a friend of mine.  She used her embroidery machine to appliqué the Sunbonet Sue’s onto the quilt.

sunbonetsuecal